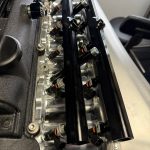
There is nothing exotic about the boost control on this car. It is Emtron’s standard closed loop strategy. SRD Tuning built the base, and I have refined the duty cycles from logs since.
What is worth showing is how the pieces fit together. Where the boost target actually comes from, which tables do the real work, and how the PID is kept out of the way.
Each section is marked. Verified means it comes straight from the calibration. Theory means it is my reasoning, not something I have measured. Observed means it is how the car behaves on the road.
Configuration
Status: Verified
- 2JZ-GTE VVTi, 3.4 litre, Pulsar G42-1200, pump fuel
- Turbosmart 60 mm wastegate, 15 psi spring, which gives 18 psi as installed
- Single Link boost control solenoid
- Emtron KV12, closed loop, absolute target, manifold pressure as the control input
Who did what matters here, so to be clear: the structure, the lockouts and the base duty cycles are SRD’s. My changes are to the initial position table, made from logged corrections, and none of them is more than 3 percent.
Where the target comes from
Status: Verified
Emtron builds the boost target from a base table, adds a stack of offsets, then clamps the result. Here is the base table:
| Pedal demand | 0 to 2,500 rpm | 3,000 rpm and above |
|---|---|---|
| 0% | 40 | 40 |
| 10 to 30% | 70 | 70 |
| 40 to 98% | 80 | 100 |
Look at the biggest number in it. 100 kPa absolute is atmospheric. The base table on its own never asks for any boost at all.
The boost comes from the first of the user offsets:
| Manifold pressure | Offset, every rotary position |
|---|---|
| 0 and 50 kPa | 0 |
| 100, 125 and 150 kPa | +200 |
Once the manifold reaches atmospheric, 200 kPa is added to the target. So with the pedal past 40 percent:
- Below 3,000 rpm: 80 + 200 = 280 kPa absolute
- From 3,000 rpm: 100 + 200 = 300 kPa absolute
And then the clamp. The Boost Target Clamp is 300 kPa absolute, roughly 2.0 bar of boost at sea level. Whatever the offsets add up to, the target cannot go past it. That is deliberate. The car runs on pump fuel, and the clamp is the safety switch that stops anything else in the stack asking for more than the fuel will take.
The rotary columns being identical is also deliberate. Every traction setting gets the same boost ceiling, and the torque model decides how much of it is actually used. Boost is not the throttle on this car. Torque is, and that is covered in Traction Control on 1,114 whp.
Why the offset can look on manifold pressure
Status: Theory
An offset indexed on manifold pressure is a feedback loop: as pressure rises from 50 to 100 kPa, the target rises with it. That would be a problem if the solenoid were active through that range. It isn’t, which is the next table.
When the solenoid is allowed to work
Status: Verified
| Lockout | Value |
|---|---|
| Throttle | 10% |
| Engine speed | 1,800 rpm |
| Manifold pressure | 110 kPa |
| Engine temperature | 60 °C |
The solenoid stays off until the manifold is already 10 kPa above atmospheric. By then the user offset has finished ramping in and the target is fixed. Off boost, cold, or at a whisker of throttle, the wastegate simply does what its spring tells it.
What takes boost away
Status: Verified
Three offsets pull the target down. Two are protection, and both are indexed against the target itself, so the higher the target, the more they take.
| Target vs engine temp | up to 100 °C | 110 °C | 120 °C and above |
|---|---|---|---|
| 180 kPa | 0 | 0 | 0 |
| 200 kPa | 0 | -10 | -20 |
| 220 kPa | 0 | -40 | -40 |
| 240 kPa | 0 | -50 | -60 |
| 260 kPa | 0 | -50 | -80 |
| 280 kPa | 0 | -50 | -100 |
| Target vs inlet air temp | up to 40 °C | 50 | 60 | 70 | 80 | 100 | 120 |
|---|---|---|---|---|---|---|---|
| 100 and 150 kPa | 0 | 0 | 0 | 0 | 0 | 0 | 0 |
| 200 to 300 kPa | 0 | -3 | -10 | -20 | -30 | -40 | -50 |
The third is by gear, and it is there for the gearbox rather than the engine:
| Gear | R, N, 1 to 5 | 6 | 7 | 8 |
|---|---|---|---|---|
| Offset, kPa | 0 | -10 | -20 | -30 |
Sixth, seventh and eighth lose 10, 20 and 30 kPa to protect the ZF’s clutches from slip. Where that gearbox runs out of capacity is covered in Where the Stock ZF 8HP70 Gives Up.
The table that does the work
Status: Verified
Everything above decides what boost to ask for. This decides how to get it. The initial position table is the feedforward: the solenoid duty the ECU applies before the PID has done anything at all.
| Target vs rpm | 1,000 to 1,500 | 2,000 to 3,500 | 4,000 | 4,500 | 5,000 | 5,500 | 6,000 | 6,500 | 7,000 | 7,500 | 8,000 |
|---|---|---|---|---|---|---|---|---|---|---|---|
| 125 to 200 kPa | 0 | 0 | 0 | 0 | 0 | 0 | 0 | 0 | 0 | 0 | 0 |
| 220 kPa | 0 | 100 | 26.5 | 20.0 | 13.0 | 10.5 | 8.0 | 5.0 | 2.5 | 0 | 0 |
| 240 kPa | 0 | 100 | 28.0 | 22.5 | 17.0 | 16.5 | 15.0 | 13.0 | 11.5 | 9.5 | 10.5 |
| 250 kPa | 0 | 100 | 29.0 | 24.0 | 18.5 | 18.0 | 17.0 | 16.5 | 15.5 | 14.5 | 16.0 |
| 260 kPa | 0 | 100 | 29.5 | 25.0 | 20.5 | 19.5 | 19.5 | 19.5 | 19.5 | 19.5 | 21.0 |
| 280 kPa | 0 | 100 | 31.0 | 28.0 | 24.5 | 23.0 | 24.5 | 26.0 | 27.5 | 29.0 | 31.5 |
| 300 kPa | 0 | 100 | 32.5 | 30.5 | 28.0 | 26.0 | 26.0 | 30.0 | 32.0 | 36.5 | 42.0 |
Read the 300 kPa row from left to right and it tells the story of a pull.
2,000 to 3,500 rpm: 100. Hold the wastegate shut and let the turbo spool. In practice this is 80, not 100, because the Max Duty table clamps the output at 80 percent everywhere. The 100 in the table is a way of saying “as much as you’re allowed”.
4,000 rpm: 32.5. The turbo is lit. Drop straight to the duty that holds 300 kPa, so the gate opens instead of letting boost run past the target.
5,500 to 6,000 rpm: 26. The lowest duty in the row.
6,500 to 8,000 rpm: 30 rising to 42. More duty is needed to hold the same target as rpm rises.
The lower rows show the spring at work. The spring holds 18 psi as installed, about 225 kPa absolute. So at a 220 kPa target the duty falls away as rpm rises, and by 7,500 rpm it is zero: the spring alone is enough. Every row above that is the solenoid adding pressure on top of the spring.
Why the duty rises at the top
Status: Theory
A wastegate valve is pushed open by exhaust pressure acting on its face, as well as by boost pressure acting on its diaphragm. As rpm rises, exhaust manifold pressure rises with it, and the valve gets more help opening. To hold the same boost, the solenoid has to fight harder, so the duty goes up. I don’t measure exhaust manifold pressure on this car, so that is the mechanism I’d expect rather than one I have logged.
How I refined it
Status: Verified
If the initial position were perfect, the PID would have nothing to correct. So the logs tell you where it is wrong. Wherever the closed loop consistently added or removed duty in the same cell, the feedforward was out by about that much.
I moved those cells towards what the PID was asking for. None by more than 3 percent. It’s refinement, not a rebuild. The aim was to take work away from the closed loop wherever the data said it was doing work it shouldn’t have to.
The PID: kept on a short lead
Status: Verified
The loop runs at 35 Hz, against Emtron’s typical 25, with a deadband of ±0.1 kPa and no input or target filtering. Emtron’s own note on the control rate is worth repeating: change it and the gains need re-tuning, because every gain is effectively per calculation.
All three gains are scheduled on boost target error. Negative error means boost is above target.
| Error, kPa | -50 | -25 | -10 | -5 | -2 | 2 | 5 | 10 | 25 | 60 |
|---|---|---|---|---|---|---|---|---|---|---|
| Proportional | 0.50 | 0.50 | 0.20 | 0.20 | 0.10 | 0.10 | 0.50 | 0.50 | 0.50 | 0.50 |
| Integral | 0 | 0 | 0 | 0.018 | 0.025 | 0.025 | 0.018 | 0 | 0 | 0 |
| Derivative | 3.00 | 0 | 0 | 0 | 0 | 0 | 0 | 3.00 | 3.00 | 0 |
The integral is clamped as well: the Positive and Negative Integral Limit tables hold it to ±5 percent duty at every rpm. Overall output is held between a 5 percent minimum and an 80 percent maximum.
One cell in the proportional table stands out. At -25 kPa of error, with manifold pressure rising at 5 percent per second, the gain is 10.00 instead of 0.50. That is the overboost catch. Boost well over target and still climbing is the one situation where the controller is allowed to hit hard.
Why it is shaped this way
Status: Theory
Proportional gain is smallest near target. Once the boost is where it should be, small errors are corrected gently, so the solenoid isn’t hunting.
Integral only works within 5 kPa of target and is zero beyond 10. During spool the error is enormous, and an integrator running through that would wind up and then overshoot when the turbo arrives. Here it simply doesn’t run until boost is close. Add the ±5 percent clamp and the integrator can trim the feedforward but never replace it.
Derivative is active between 10 and 25 kPa below target. That is boost on its final approach, rising fast towards the target. Derivative reacts to rate of change, so it starts opening the gate before the boost gets there, taking the edge off the arrival rather than correcting an overshoot afterwards.
It’s the same philosophy as the traction control. Feedforward does the work. The closed loop is soft near target, gated where it could do harm, and clamped so it can never take over.
Housekeeping
Status: Verified
Two things in the file worth knowing if you are reading your own:
- The Boost Solenoid Deadtime table is zero from 10 to 20 V, so solenoid duty isn’t corrected for supply voltage.
- The Boost Overall Target Trim is zero. It’s a single number that shifts every target at once, which makes it a quick way to test a change without touching the tables.
Does it work?
Status: Observed
Spooled by 3,400 rpm. On target by 4,200. And from there it pulls, hard, all the way to 8,400.
That lines up with the table. The 100 percent hold ends at 3,500, the duty drops to 32.5 at 4,000, and the car is on target 200 rpm later.
The principle
Get the feedforward right and the PID has almost nothing to do. Then let the logs tell you where it isn’t right: wherever the closed loop is consistently correcting, the initial position is wrong by that much.
Every number here is specific to this turbo, this wastegate, this spring and this fuel. The data is not transferable, but the principle is.
How the torque model decides how much of this boost is actually used is in Traction Control on 1,114 whp. Why the top gears lose boost is in Where the Stock ZF 8HP70 Gives Up. The fuel system feeding all of it is in Staged Injection on the Emtron KV12. Full specification is on the Supra project page.